
Ai Video Editing Course in Mumbai
11 + Years Experience
7000+ Trained Students
5500+ Student Placements
50+ Movie Experience
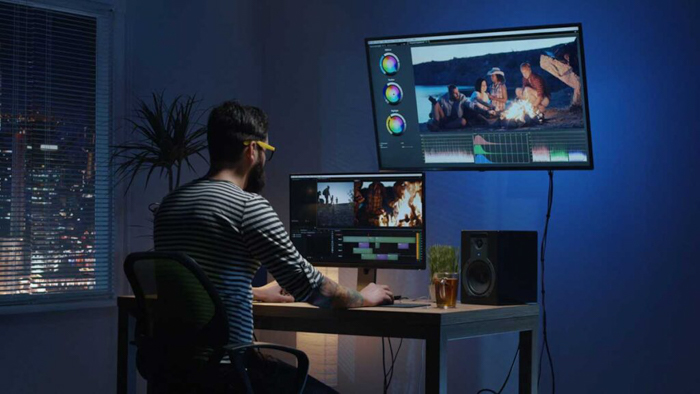
What is AI Video Editing?
AI Video Editing is the modern approach to creating professional videos using Artificial Intelligence to simplify and speed up the editing process. Instead of spending hours on repetitive tasks, AI assists creators with intelligent editing, automated workflows, enhanced visuals, smart audio improvements, and faster content production.
An AI Video Editing Course helps students understand both creative editing techniques and AI-powered workflows used across digital media, advertising, filmmaking, social media, marketing, education, and content creation. By combining creativity with automation, learners become future-ready professionals capable of producing high-quality videos efficiently.
Benefits of Learning Ai Video Editing
AI Creative Skills
Faster Content Creation
Professional Portfolio
Creative Storytelling
Enhanced Visuals
Client Project Experience
Smart Video Editing
Intelligent Workflows
Industry-Ready Training
Time-Saving Automation
Social Media Expertise
Future Career Growth
Video Editing Course Software
video editing plays a crucial role in transforming raw footage into a polished, coherent, and engaging final produc

After Effects

Premiere Pro
Filmora

Audacity
EXCELLENTTrustindex verifies that the original source of the review is Google. My name is Sandeep Rahate and I am an interior designing student. My overall experience with my designer course is very satisfying. My "Autocad" and "Photoshop" classes were very good. Online and offline classes experience was also very good. They give attension to each and every student. I am satisfised by the way the teachPosted on GoogleTrustindex verifies that the original source of the review is Google. I had a great time doing graphic designing course and everyone involved in the Hue&Rig institute has made it a great experience. I look forward doing more courses with you guys in the future and have been recommending you to everyone I know. Thank youPosted on GoogleTrustindex verifies that the original source of the review is Google. I am a student of hue n rig. I have just completed one month in online classes.all of you are also getting our support in online classes.thanks for your support sir n missPosted on GoogleTrustindex verifies that the original source of the review is Google. Hue n rigs have great teachers and guides who are available 24 x7 for any help. I have learnt a great deal from the graphic design ing course, and although in lockdown have succeeded in conducting lectures. It was very homely too n the workspace is ideal. Thanks to the sirs and teachers to taught with dedication n respect.All the best. May you grow to greater heightsPosted on GoogleTrustindex verifies that the original source of the review is Google. I Mr.Pratiek Veluthamannunkal Student of Hue & Rig like to mention online classes are very good during lockdown period as we do not have to carry sanitzer & mask during our travel for lectures at the same time classroom lectures excellent because during lectures our doubts can be cleared then and there. No Doubt our faculty take lectures online and in class the way the student understand . But we miss our faculty as we can't communicate personally. (But on Phone they are available to clear our doubts)Posted on GoogleTrustindex verifies that the original source of the review is Google. I am a student of Hue N Rig. I have just completed one month.I am having a good experience with them, the trainers are helpful, supportive and friendly,It help us to create new things.thanks for your support.

Event Marketing
Film-Industry

Gaming-Industry

Social-media-Content-Creation

Advertising and Marketing

Corporate Industry

Education Industry

Entertainment
Download Our FREE APP Now
Assignments & Projects
Course Practice Files
Course Video Content

Chat with Trainer
Course Content Materials
Course PDF Files
Enroll now and get certified for Best Video Editing Course in Mumbai by Hue N Rig Institute Of Art & Design

Why Learn Video Editing Course From Hue N Rig?
Affordable & Flexible Fees Structure
All Certified Training Program
Online & Offline Lectures Flexibility
Practical & Conceptual Training
Regular Assignments & Monitoring
Modern techniques of learning
Interactive Group Discussion Session
Q & A Problem Solving Session
Projects Covered Inside Video Editing Course
Premiere Pro Project
- Mashup video
- Teaser
- Wedding highlight
- Traditional videos
- Multi Cam Edit
- B-roll videos
- Wedding reel
- Color grading
- Lyrics in Videos
- Remix music video
- Day to night
After Effects Projects
- Professional Croma
- Cinemagraph
- Ad Making
- Tracking 1,2,4 Point
- E-invitation
- Parallax
- Keyframe animation
- Slide Show
- Video Portfolio
Filmora Projects
- Croma Video Editing for Youtube
- Explainer Video
- Reels & Shorts
- Social Media Content Creation
- Silent Video
- Motion Video
- Tracking Video
Audacity
- Noise cleaning
- Audio Merging
- Audio Trimming
- Audio Mixing
- Audio Effects
- Bass Boost
- Exporting
Video Editing is used by various industries
Corporates
Wedding
Ad Agency
Digital Marketing
Films
Fashion Industry
Social Media
Education Sector
Flexible Payment Methods
Cash
UPI
EMI
Cheque
NEFT
Video Editing Course Fees/ duration
Video Editing Course
-
6 months Duration
-
Certified Program
-
Job Assistance
FREQUENTLY ASKED QUESTION FOR VIDEO EDITING COURSE IN MUMBAI
Video editing is the process of editing segments of footage, special effects, and sound recordings in post-production.
Adobe Premiere is one of the most used video editing tools. It is also the software used by professionals while Final Cut Pro (FCP) is a video editing program for Mac.
There are jobs for video editors, such as Film Editor, TV Studio Editor, Animator, Marketing Video Editor, Social media video editing, Education video editor, Wedding video editor and many more.
Nothing is hard to learn if you are learning under good mentorship. We make a simple breakdown of learning steps so it's easy for students to understand.
Video editing is both a worthwhile career and useful ability for professional and personal use. Nowadays videos are used both in marketing and commercials so video editors have a great future.
Video editing course is used to understand the types of video editing and their tips and tricks to create an effective video for various purposes.
Yes! Video Editing is all about dedication and passion to anyone who likes shooting or editing video even just as a hobby you can.
Yes! At Hue N Rig Institute our all courses are certified.
Yes. you can take the course once but will always assist you even after the completion of the course with access to its learning material and doubts. We always maintain good life long relations with students and ex-students.
At our institute there is no upper age limit for learning any course; one with passion and dedication can pursue the course. Min age the student must be 10th appeared..
It doesn't take long to learn Video Editing but like any other profession, you will never stop learning and improving your skills day by day.
Video editing includes timeline management, effects, transitions, video cuts, overlays, sound edits and sync and lots more…
This is totally an offline classroom training.
Offline classroom training gives u an extra facility to communicate and interact with faculty on the spot if there is some doubt. Also there is always a plus point of classroom training over recorded lectures